As a kid, I remember witnessing my father hanging up his first-ever vision board in our house. On large, yellow cardboard paper, I marveled at the concept. As time went by he would show me how some of the picture cutouts on his board had manifested. I had even taken part in some of them. Despite my father’s success, I have never been the biggest fan of vision boards. While I encouraged the creation of them, I have never attempted to make my own until recently. The reason is that I always preferred other ways of manifesting such as writing things down, scripting, visualizing through meditation, or prayer-like processes. I also never liked the general aesthetic of the vision boards. Random pictures on a small square poster board hadn’t resonated with me much, and neither had taping images up on a wall. That was until I began learning more about feng shi from Marie Diamond.
Today I am going to share with you how I created what I call my aesthetically pleasing vision “corner”. It utilizes 1) affirmations, 2) inspiring visuals, and 3) feng shui and 4) clear as day intentions. I never liked the overwhelming vagueness, that I found in my friends’ vision boards, so I channeled my inner Virgo-rising and got very methodical.
Here’s what you’ll need.
- A computer/ tablet with internet
- A list of what you want to manifest.
- A printer or access to one
- A compass or compass app
The aesthetic I have chosen for my vision corner is “polaroid pictures”. For this reason, I will be referring to an online generator in this tutorial.

Photo by KAROLINA GRABOWSKA
Create a list of what you want to manifest. When you have that completed, go through each item on your list and make sure each intention is written in the present tense. These intentions will function jointly as affirmations. Each should also incorporate ‘I AM’ or ‘I HAVE’ phrasing. For more clarity on how to write affirmations, refer to my post: Self-growth; transform your beliefs with affirmations. See sections 3 & 4.
Example affirmations:
I AM TRAVELING TO BEAUTIFUL PLACES IN EUROPE.
I HAVE A HEALTHY DIET THAT I LOVE.
Step 1. Know your intentions
picutr of book and photos

Photo by Lisa Fotios
Step 2. Find photos that inspire you
Using the power of the internet, look for photos that both inspire you and fit with the intentions you have written above. Keep in mind that these are images you will look at every day. I included some example ones below, matching the sample affirmations in step 1:
Photo by slon_dot_pics Photo by Ella Olsson
Step 3. Generate your polaroid
Go to the following link: Polaroid Generator This page will show you a preview of the polaroid image you can create through their generator.
A). Scroll down until you see “Configuration”. There, will you choose your presets. You can adjust the color, alignment, font size, etc. Feel free to play around.

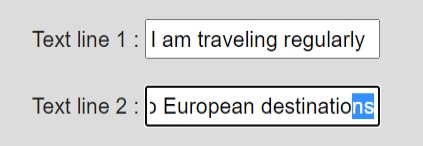
B.) Pay close attention to Text line 1 and Text line 2.

This is where you will type in your affirmation. In doing so, try to fill the first line as much as it allows. When you reach the character limit, finish the sentence in Text line 2. Depending on the phrasing and length of your sentence, you may have to play around with the character limit, choosing instead another word that fits into the character limit, and also your intention.
‘I AM TRAVELING TO BEAUTIFUL PLACES IN EUROPE.’ Doesn’t fit, so here’s me trying to adjust it. Both examples below work.
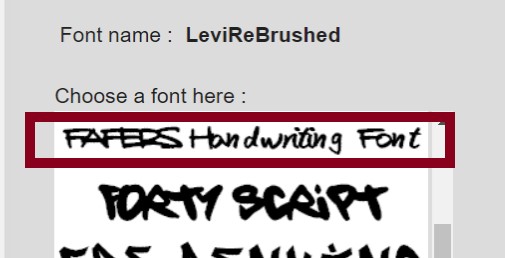
C.) Next, choose your font. I choose the one indicated below.

D.) Upload your selected image. And choose shadow presets. (I deselect them all).

E.) Select Generate. You will then be brought to a new page where you can either download your creation or go back to make adjustments.

Step 4. Print your creations.
When you finished all your creations, the next step is to print them. You can place all of your images onto Word, or Google docs for printing, or use another method. As for me, I don’t have a printer. After organizing them onto a file, I saved them onto a USB device and took them to a center to have them printed on normal printer paper (in color).
Step 5. Cut out & hang in your success direction.
Once you have your prints and cut them all out so they look like polaroids, activate your intentions for success by placing them in your success direction. By incorporating feng shui principles and placing your images in the appropriate corner of your space you can better optimize your manifestations, watching them come to fruition much quicker. Discover how to find your success direction here.

Photo by Taryn Elliott
Conclusion
My vision corner is specific, inspiring, and made for success. I make sure I choose pictures that invoke feeling when I look at them. Below each image, I write an affirmation in the present tense, that connects with my chosen image. This presents your intention in a clear way for your subconscious mind to absorb. Soon the image becomes more and more real to you. I found that many of mine came true some immediately and some over months. Often, they have manifested in ways I hadn’t anticipated. Since I’ve taken down ones that have come true and replaced them with new intentions.
I hope that you give this tutorial a try and let me know how you’ve chosen to organize photos in your corner! Until then, keep adventuring!
Featured photo by Taryn Elliott from Pexels


[…] Create a vision board. Creating a vision board is a brilliant and fun way to get your mind right and aligned to your dreams! A vision board is a visual representation of what you want to attract into your life. Often, it is a tool used for manifestation. Cut out some photos that represent what you want, where you want to go, and how you want to feel, and glue them onto a poster board. If you want to learn how to make a cool alternative version of the vision board read my post, Forget vision boards: How to create a vision corner. […]